🔥 Instructions
- Heat the milk
- Pour the milk into a heavy-bottomed pot and heat over medium heat.
- Stir occasionally so it doesn’t stick to the bottom.
- When it starts to gently simmer (don’t let it boil), turn off the heat.
- Curdle the milk
- Add vinegar or lemon juice, 1 tablespoon at a time, stirring slowly.
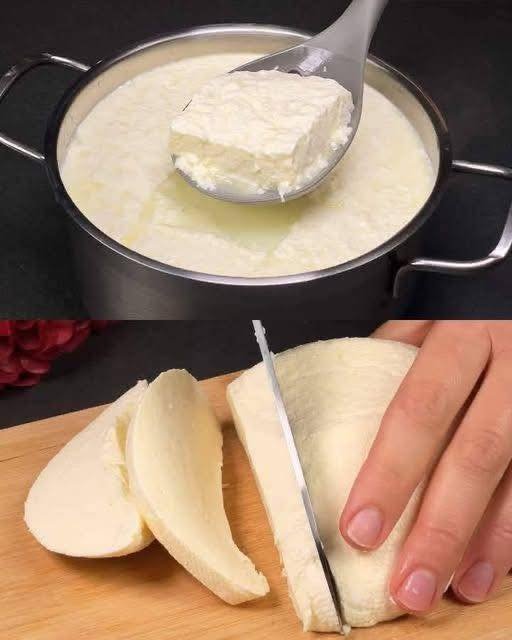
- You’ll see the milk begin to separate into white curds (cheese) and a yellowish liquid (whey).
- If it doesn’t curdle completely, add a bit more vinegar/lemon juice and let it sit for 2–3 minutes.
- Strain the curds
- Line a strainer with cheesecloth (or a clean kitchen towel) and pour in the curdled milk.
- Rinse the curds gently with cold water to remove the vinegar or lemon flavor.
- Squeeze out as much liquid as possible.
- Press and shape
- Add salt and butter to the curds, mixing gently.
- Gather the cheesecloth, twist tightly, and press under a heavy object (like a pot filled with water) for 1–2 hours.
- Unwrap and enjoy!
- Once firm, unwrap your cheese and store it in the fridge.
- You’ll get a smooth, sliceable, homemade cheese—perfect for sandwiches, salads, or melting on toast.
💡 Tips:
- Use whole milk for best yield and creamy texture.
- The leftover whey can be used in bread doughs, soups, or smoothies—it’s full of protein!
- If you prefer softer cheese, reduce pressing time.
Would you like me to show you a version with herbs and garlic for a flavored, spreadable cheese (like homemade Boursin)?
Related Posts:


 – A Classic Comfort Dessert")


Pages: 1 2