How to Make Soft Milk Bread from Scratch: A Step-by-Step Guide
Sure! Here’s a longer version of the article on how to make soft milk bread from scratch.
How to Make Soft Milk Bread from Scratch: A Step-by-Step Guide
If you’re someone who’s tired of buying bread from the store and want something homemade and far superior, then look no further! Soft milk bread is not only easy to make but also so much more flavorful than store-bought loaves. With its soft, pillowy texture and subtle sweetness, milk bread is the ultimate comfort food.
In this guide, we’ll take you through the entire process of making your very own soft milk bread from scratch. Whether you’re new to baking or a seasoned pro, this recipe is perfect for anyone who wants to enjoy fresh, homemade bread without any special equipment.
Why Milk Bread?
Milk bread is a popular type of bread in various parts of the world, including Japan, China, and parts of Southeast Asia. It’s known for its soft, fluffy texture that’s perfect for everything from making sandwiches to serving as a snack with butter or jam. What makes milk bread so special is the addition of milk and cream to the dough. These ingredients contribute to its soft texture and rich flavor, setting it apart from regular bread.
The other secret to achieving that soft, melt-in-your-mouth texture is the use of a process called the “tangzhong method.” This technique involves cooking a small portion of the flour and liquid before adding it to the rest of the dough. This helps the bread retain moisture and remain soft for longer. However, this recipe simplifies things for you while still delivering a deliciously tender loaf.
Ingredients You’ll Need
Before you begin, gather the following ingredients:
3 cups all-purpose flour – This is the main structure of your bread. You can substitute part of it with whole wheat flour for a healthier version, but all-purpose flour works best for that classic soft texture.
1/4 cup sugar – This small amount of sugar adds a subtle sweetness to the bread. It also helps activate the yeast.
1 tsp salt – A necessary addition to balance the sweetness and enhance the flavor of the bread.
2 tsp instant yeast – Instant yeast is great because it doesn’t need to be activated in warm water, making the process faster and easier.
1/2 cup warm milk (about 110°F or 45°C) – Milk is a key ingredient in milk bread and contributes to its rich flavor. Warm milk helps activate the yeast, allowing the dough to rise.
1/2 cup heavy cream – The cream adds richness to the dough, which results in a super soft texture. If you don’t have heavy cream, you can substitute it with whole milk, but it will slightly change the texture.
2 tbsp butter, softened – Butter helps make the bread even more tender. It’s also responsible for the golden brown crust and rich flavor.
1 egg – The egg helps with the structure of the bread and adds a little extra richness.
1 tsp vanilla extract (optional) – Vanilla extract can enhance the overall flavor of the bread. If you prefer, you can skip it for a more neutral taste.
Equipment Needed
To make this soft milk bread, you’ll need:
Mixing bowl – A large enough bowl to combine all the ingredients.
Loaf pan – You’ll need a 9×5-inch loaf pan for the bread to bake in.
Measuring cups and spoons – Accurate measurements ensure the best results.
Stand mixer or hand mixer (optional) – While kneading by hand works fine, using a stand mixer can make the process quicker and less strenuous.
Kitchen towel – Used to cover the dough while it rises.
Step-by-Step Instructions for Soft Milk Bread
Step 1: Activating the Yeast
Start by activating your yeast. In a small bowl, pour the warm milk and add the sugar. Stir until the sugar dissolves. Sprinkle the yeast over the milk and give it a gentle stir. Let the mixture sit for about 5-10 minutes. During this time, the yeast should begin to foam up, which means it’s alive and ready to work its magic in your dough.
Step 2: Combining Dry Ingredients
While the yeast is activating, take a large mixing bowl and combine the flour and salt. Stir them together until they’re evenly distributed. This step ensures the salt is evenly spread throughout the dough, preventing it from inhibiting the yeast’s growth when added later.
Step 3: Adding Wet Ingredients
Once your yeast mixture is frothy, add it to the flour mixture, along with the heavy cream, butter, egg, and vanilla extract (if using). Stir everything together until the dough starts to form.
Step 4: Kneading the Dough
Now it’s time to knead the dough. If you’re using a stand mixer, attach the dough hook and knead for about 6-8 minutes on medium speed. If kneading by hand, transfer the dough to a floured surface and knead for about 8-10 minutes. The goal is to have a smooth, elastic dough that doesn’t stick to your hands. Add a little more flour if necessary, but don’t overdo it. The dough should still be slightly tacky to the touch.
Step 5: First Rise
Place the dough in a lightly greased bowl and cover it with a clean kitchen towel or plastic wrap. Let the dough rise in a warm place for 1-1.5 hours or until it doubles in size. You can speed up the process by placing the dough in an oven set to the lowest setting, but make sure it’s not too hot—just warm enough to help the dough rise.
Step 6: Shaping the Dough
Once your dough has risen, punch it down to release the air. Divide the dough into three equal portions. Shape each portion into a ball by folding the edges underneath and pinching them together at the bottom. Place the dough balls side by side in a greased 9×5-inch loaf pan. Gently press them into the pan so that they fit snugly.
Step 7: Second Rise
Cover the loaf pan with a kitchen towel and let the dough rise for another 30-45 minutes. It should rise up and fill the pan. This second rise ensures your bread will be nice and fluffy when baked.
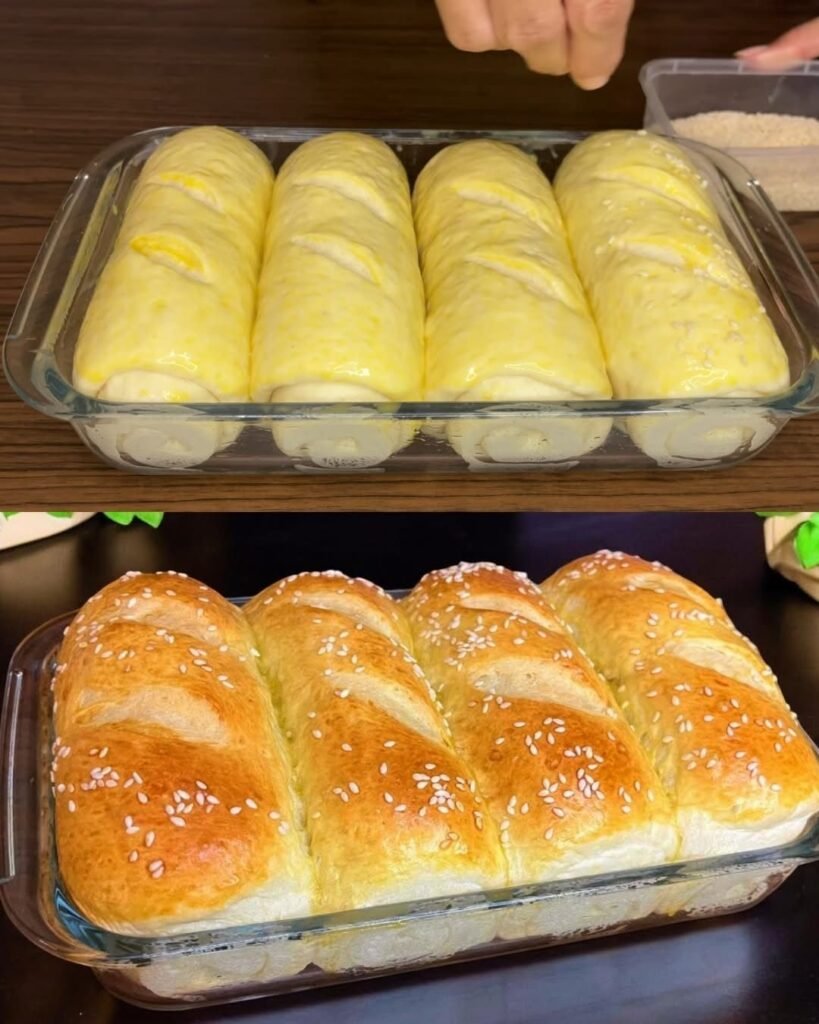
Step 8: Baking the Bread
Preheat your oven to 350°F (175°C). Brush the top of the dough with a little milk or melted butter for a golden finish. Bake the bread for 25-30 minutes, or until the top is golden brown and the loaf sounds hollow when tapped on the bottom. The internal temperature of the bread should be around 190°F (88°C) when done.
Step 9: Cooling
Once the bread is baked, remove it from the oven and let it cool in the pan for about 10 minutes. Then transfer the loaf to a wire rack to cool completely. This helps prevent the bread from becoming soggy.
Tips for Perfect Milk Bread
Knead it well: Proper kneading is essential for achieving the soft, airy texture of milk bread. Don’t rush the kneading process.
Room temperature ingredients: Make sure your butter, egg, and cream are at room temperature before adding them to the dough.
Don’t skip the second rise: Allow the dough to rise for the full amount of time during the second rise. This ensures your bread will be light and fluffy.
Storage: Once cooled, store your milk bread in an airtight container or a bread box. It should stay soft for up to 3 days, but you can also freeze it for longer storage.
To provide the best experiences, we use technologies like cookies to store and/or access device information. Consenting to these technologies will allow us to process data such as browsing behavior or unique IDs on this site. Not consenting or withdrawing consent, may adversely affect certain features and functions.
Functional
Always active
The technical storage or access is strictly necessary for the legitimate purpose of enabling the use of a specific service explicitly requested by the subscriber or user, or for the sole purpose of carrying out the transmission of a communication over an electronic communications network.
Preferences
The technical storage or access is necessary for the legitimate purpose of storing preferences that are not requested by the subscriber or user.
Statistics
The technical storage or access that is used exclusively for statistical purposes.The technical storage or access that is used exclusively for anonymous statistical purposes. Without a subpoena, voluntary compliance on the part of your Internet Service Provider, or additional records from a third party, information stored or retrieved for this purpose alone cannot usually be used to identify you.
Marketing
The technical storage or access is required to create user profiles to send advertising, or to track the user on a website or across several websites for similar marketing purposes.


: A Sweet Tradition That Never Gets Old 🍩🇭🇺")


